Google Apps Script to monitor an email box and send notifications

googlemail-128

Here’s the scenario: you have a second gmail account that gets email infrequently, but you need to monitor it.  For whatever reason (company policy, in my case), you can’t forward the email to your main account.

I discovered that I could log into the second Google account and attach a Google Apps Script to a spreadsheet.  The script monitors the gmail account for unread threads.  If it finds any, it sends a message to my main account.  The script has a time-driven trigger that can be set to run as frequently or infrequently as desired.

To use the script, make a copy of this spreadsheet.  Open the spreadsheet and edit the cells that contain the email message parameters.  Then go to Tools – Script editor.  Choose Resources – Current project’s triggers.  Add a time-driven trigger that runs the script as often as you’d like.

Email Notifier trigger

Joomla 3 Contact Form doesn’t send email – I give up!

joomlaI love finding the forum or blog posts that have titles like “Problem I Have – Solved”.  This is not like that.

I installed Joomla 3.2.3 on my web host where I’ve been running Joomla 1.5.26.  The Joomla 3 installation can send mass email, but its contact forms don’t send.  On the 1.5 install, both mass emails and contact forms send fine.

  • It can’t be the mail settings, since the mass emailer works fine.
  • It can’t be the mail program on the host, since the 1.5 install sends fine and the mass mailer on the v 3 install works.
  • It can’t be an issue with the domain of the web host vs domain of my From: address for the same reasons.
  • It could be contact form options, but I’ve tried everything I can find.
  • I’ve tried the tips from blog posts regarding copying libraries from a new install – no luck.

I finally had to admit defeat and installed the free version of the Flexi Contact extension.  I hate to give up, but installing that extension got me a working contact form in a few minutes.

Repairing an HDMI cable

A friend asked me if I could repair an HDMI cable. The end was broken, and because it was run through the wall in a complicated way when the room was built, it would be very hard to run a new one.

After reading several articles online, I realized that one of the hardest parts of the job would be figuring out the wire coloring – there doesn’t seem to be a standard. The cable was labeled “LWC Digital Media Interconnect E190607-N”. I found this document that got me part of the way, but I had to use an ohmmeter and the broken end to figure out the shielded pairs. At the bottom of this post is the pinout that I confirmed.

My first try was with this solderable connecter kit. But I’m not great with super-detailed soldering, and I couldn’t wrestle the the wires into the correct places and get them soldered without shorting each other out.

There is good advice in this forum discussion, which led me to success with this hdmi field termination kit.  This solution results in a female hdmi connection, which you then extend to the device with a short (normal) hdmi cable. With this kit, a radio shack project box, and a short hdmi cable, I was able to repair the broken cable!

halfway there

halfway there

Continue reading

Google Apps Script to find duplicates in a Google spreadsheet

Sometimes you want to find duplicate rows in a Google spreadsheet, but don’t want to examine every column — maybe you want to exclude a timestamp or other columns.

This Google Apps Script takes a list of columns that you care about.  Then it temporarily copies those columns to a new sheet, looks for duplicates, highlights the duplicate rows in red on the main sheet, and removes the temporary sheet.

The script is attached to this Google Spreadsheet. Make a copy of this sheet, or just copy the script.  You can do that by going to Tools – Script Editor and copying the script to the script editor of your own spreadsheet. Then edit the line that defines the important columns. After you re-open your spreadsheet, the “My Scripts” menu will show up. The first time you run the script, it will bring up the permissions dialog. You’ll need to run it again to make it work.

Here’s a video of it in action:

Opening an S-hook to mount a playground swing

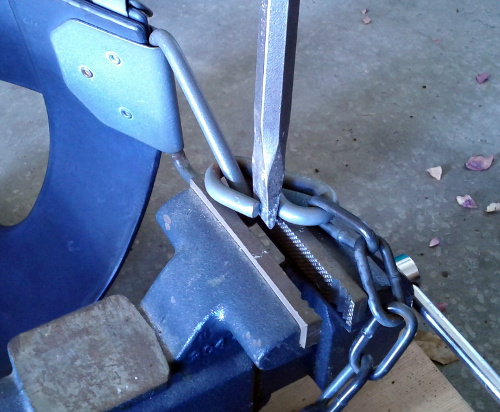
chiselI needed to pry open some heavy duty S-hooks to change out a playground swing.  There were different suggestions online, but none that seemed like they would work for S-hooks this thick.
Finally I realized that I could hammer a chisel into the gap, and it worked!

Now I just need a better way to close them back up — I held them with a Vise-Grip and hammered on them, but they rotated some and got sharp barbs where the Vise-Grip tore them.  I had to grind them down with an angle grinder.

Where did all the space go on my Mac hard drive?

Before I switched to a Mac, WinDirStat was my favorite tool for figuring out what was taking up space on my hard drive(s).

There doesn’t seem to be a great free alternative on OS X, but it’s been totally worth it to spend $12.99 on WhatSizeMac (also available on the Mac App Store).

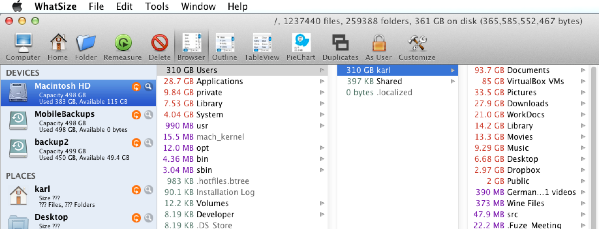
When you first run it, you get a list of your drives.  Click on the one you want to analyze, and it will start spinning…

whatsizeWhen it’s done, you’ll be in a folder-browsing interface that lets you drill down and find the files and folders that are taking up the most space.  This has helped me clear out a lot of unneeded files from my hard drive (video footage that I didn’t need anymore mostly).

Check it out!

whatsize2

Temporarily use a blog page as your front page

I wanted to temporarily redirect people who browse to www.keynote.org to the page www.keynote.org/donate.  Since this is a WordPress site, I should have been able to easily do this by logging into the dashboard and going to Settings – Reading and changing the static front page to the Donate page.  For some reason, the Donate page wasn’t rendering properly, even though the page looked fine when it wasn’t set as the front page.
Rather than take the time to figure out what is going on in the WordPress processing, I added the following line to the .htaccess file after “RewriteBase /”:

RewriteRule ^$ http://www.keynote.org/donate [L]

This matches any browser requests that don’t have anything after the hostname and redirects them to /donate. It seems to be working well so far.

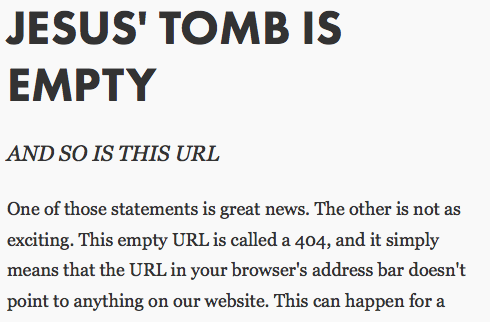
Communicate your message through a custom 404 error page

Mars Hill 404

I love the idea of using a custom  error page to communicate the gospel — I wish I were that creative!  Above is the 404 page that you used to get from Mars Hill Church.

Think about ways that you can use your 404 page to educate, encourage, or entertain.  Hopefully your site is organized well enough that people won’t see the page often, but they will eventually — it might as well be a positive experience!

Depending on how you’re hosting your web site, there are different ways to customize your error pages.  If you’re using WordPress, your theme might have a custom 404 page template as described here.  If you’ve coded your site manually, your web host might have a control panel to edit error pages, or you can point to custom error pages via your .htaccess file.  The web host 1and1 shows how to use the .htaccess file here.

1and1 upload_max_filesize problem

This is one of those frustrating stories for a tech, where you bang your head against a problem for a few hours, finally fix it, then try to break it again to document it and it doesn’t behave the way you expect.  But it’s still working, so maybe it will still help someone else…

I was trying to upload a 4 MB photo to my WordPress 3.4.2 site hosted at 1&1, and the uploader told me that it was too big — that the maximum upload file size was set to 2 MB in php.ini.  It doesn’t appear that 1&1 gives me access to the main php.ini, so I tried to add one to the root folder and/or the wp-admin folder of my WordPress installation.  Neither seemed to work, but I eventually figured out that I needed the file in the wp-admin folder and I needed to log out and back into the WordPress dashboard.  Here’s the simple php.ini that I added to the wp-admin folder:

upload_max_filesize = 10M
post_max_size = 10M

What was extra frustrating was what happened when I removed the php.ini to document this: instead of going back to 2 MB, the maximum upload size went to 8 MB.  That’s bigger than I needed, and if it had started that way I wouldn’t have had to go through all of this.  I can’t explain it!