Author Archives: karl.kranich

Choosing a Microcontroller

Maker Shed has a new Microcontroller Comparison chart comparing six Arduino variants, the Raspberry Pi, and the BeagleBone.

I’m still amazed by the hobbyist wonderland that we live in these days — the number of choices, the capabilities, and the low costs are unbelievable.

For a nice introduction video to the Arduino series, see the descriptions at robotshop.com and the video at the bottom of the page.

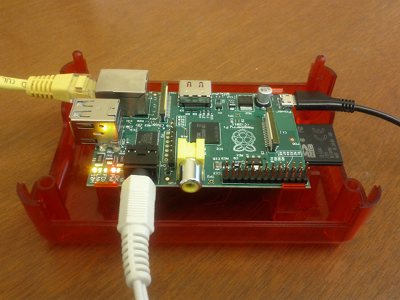
Raspberry Pi White Noise Generator

It’s helpful to have a white (or brown) noise machine outside our director’s office, since his office is next to the lunch room and it helps to make his conversations more private.  But all of the machines that I saw on the market are sleep-oriented, and expect that you want them to turn off after a certain amount of time.

We started with a laptop, powered speakers, and the SimplyNoise.com web site (we like the “Brown Noise” sound there).  We could use the mute button on the laptop or the power button on the speakers to turn the sound on and off.  But that’s a waste of a laptop if the machine is good for anything else, and problem-prone if the laptop isn’t good for anything else.

So I decided that this would be a good first project for the Raspberry Pi. I found that mplayer will loop an audio file forever if you use the “-loop 0” switch. It does go silent for a split second when it’s looping, so you’ll want an audio file at least 15 or 20 minutes long to minimize the number of times it sounds like it’s stuttering.

There are plenty of tutorials out there about getting started with the Pi.  After that, it’s as simple as:

  1. Load up an mp3 or wav file with 15 or 20 minutes (or more) of noise.
  2. sudo apt-get install mplayer
  3. create /etc/init.d/whitenoise.sh (included below)
  4. add it to system startup with “sudo update-rc.d whitenoise.sh defaults”

This could also be used as a Music on Hold player for older phone systems.

#! /bin/sh
### BEGIN INIT INFO
# Provides:          whitenoise
# Required-Start:    $local_fs
# Required-Stop:     $local_fs
# Default-Start:     2 3 4 5
# Default-Stop:      0 1 6
# Short-Description: whitenoise
# Description:       plays whitenoise file.
### END INIT INFO
/usr/bin/mplayer -quiet -loop 0 /home/pi/whitenoise.mp3 < /dev/null &
exit 0

Outlook 2010 Out of Office and Free/Busy Problems

Someone in our office was getting the error “the server is currently unavailable” when trying to change Out of Office settings, and also when trying to see other people’s free/busy information.
I have fixed this problem in the past by making sure that the dns zone for the primary email address has an SRV record that points to our client access servers (I think that’s the right term — I use the same hostname that we use for Outlook Web Access).  Here’s an overview of what goes into the SRV record.  If you have a user with the primary email address of user@examplecompany.com, but your email server is mail.example.com, the SRV record goes into the examplecompany.com zone and contains the following info:

   service: _autodiscover
   protocol: _tcp
   priority: 0
   weight: 0
   port: 443
   target: mail.example.com
   ttl: 14400

The situation in this case had an extra complication:  I did not have access to the dns server for examplecompany.com.  In this case, I used a quick and dirty workaround and set up an instance of dnsmasq on a linux server.  Dnsmasq is one of the few services where you can say “return a certain record for one host in examplecompany.com, but forward all other examplecompany.com requests to the real dns server for that domain”. I think you can also configure PowerDNS to do this. I put the following statement in the dnsmasq.conf and pointed the user’s laptop to the dnsmasq machine:

srv-host=_autodiscover._tcp.examplecompany.com,mail.example.com,443

It’s a kludge that only works when he’s in the office, but hopefully Outlook doesn’t need to reconfigure very often.

Creating an on demand version of your Wowza recording for iOS and browser viewing

After recording a live stream with Wowza, it was not as simple as I thought to make the recording available for on demand viewing in a way that works for browsers and iOS devices.  I moved the recording to my S3 bucket and was trying to make it available via CloudFront.

After much trial and error, the solution had two parts:

1. Convert the file from flv to mp4.  I used AVS Video Editor with custom file settings to get an H.264 file with “mp4 iso v.2”

2. Serve up the file with a jwplayer playlist that contains two sources: an rtmp source from a CloudFront streaming distribution for browsers, and an http source from a CloudFront download distribution for iOS devices.  Here is some example code:

How to mount an S3 bucket on your EC2 Wowza instance

AWS StorageThere are good instructions here about getting going with S3 on EC2.  I just wanted to let people know that I found s3fs already installed on my Wowza EC2 instance, and in a different location than in that forum thread.

After creating the /etc/passwd-s3fs file, I mounted the bucket with the commands:

  • sudo mkdir /mnt/bucket
  • sudo /usr/local/bin/s3fs bucket-name /mnt/bucket

Inexpensive, commercial-free live streams with Wowza and EC2

After streaming several live events with Livestream and Ustream, the advertisements that they embed have become increasingly intrusive.  Ustream now inserts video ads into the middle of a webcast, which will result viewers missing parts of the show.

Someone suggested running Wowza Media Server on an Amazon EC2 instance.  For occasional webcasts, combining the $5/day Wowza license with $0.26 per hour for EC2 and the free Adobe Flash Media Live Encoder (FMLE), and you have a very affordable and powerful system.  And it’s not too hard to piece together.  Here’s what you’ll need:

  1. An audio/video source, obviously.  This can be as simple as a webcam.  We already had an s-video switcher and a sound board at the venue, so we used the switcher to choose between a camera, DVD player, and computer (for graphics).  We combined the s-video and aux outs from the sound board with a Canopus ADVC-110 analog to digital converter.  That connected to the broadcasting laptop via firewire.
  2. To send the stream to the media server, you need some software.  Adobe FMLE works well and is free, and it’s what we used.  It doesn’t let you do titles or switch between video and graphics, but we did some of that with the s-video switcher.  If you have $500, you can invest in Wirecast, which I’ve heard very good things about.  I tried XSplit, but it didn’t like the Canopus device.
  3. Sign up for EC2 from Amazon Web Services (AWS) and spin up a Wowza instance.  Amazon offers preconfigured Wowza servers that will do everything you need for simple webcasts.  There are good instructions here.  I did notice that I didn’t need to create the security group mentioned in the instructions — Amazon created one automatically for the Wowza server.
  4. Start streaming from FMLE or your other streaming software to the Wowza server.
  5. Embed the stream on your web site with a player like JW Player (free for noncommercial use). If you want viewers to be able to use iOS devices, make sure that you configure your stream according to the tips in this thread.  Here is the code that we used on our web site to enable regular browsers in addition to iOS devices:
Loading the player ...

If you want the Wowza server to automatically record the stream, it’s not difficult to set up a new stream type called “live-record” on the server.  Just point your streaming software to that, and you’ll have a file in the content directory of the server when you finish the webcast.  Look here to get started.

I hope this helps someone get started with commercial-free live streaming!

Android email is working again!

Several weeks ago Sprint updated my Nexus S 4G to Jelly Bean, and my Exchange email/calendar/contacts have been dead since.  I didn’t realize how much I depended on having my calendar in my pocket!

I finally found this thread, and tried the simple steps in comment #78: enable autosync and recreate the account with the default setting of “push” until things start working.

Success!  Email and calendar are working!  (Still verifying contacts).

Using the Dell Recovery Partition on an Inspiron 1520

when “Repair System” doesn’t show up on the advanced boot options menu

Vista repair

I was asked to put an Inspiron 1520 back to factory condition for resale, and there was a catch: no OS disk was available, and XP had been installed over the original Vista Home Premium, so there was no way to access the Recovery partition.  The good news was that the Recovery partition was there.

Big thanks to Dan Goodell and his instructions at http://www.goodells.net/dellrestore/vista/vistarecovery.shtml !  By borrowing a Vista install DVD and following his careful instructions, I was able to access the Recovery Partition and expand the system image found there.

For my purposes, I had to add two extra steps:

  1. The imagex step writes all the necessary files to the main partition, but it doesn’t remove any personal data from that partition.  You need to use other utilities to wipe the partition first.
  2. After the rebuild, the machine wouldn’t boot to Vista.  But that just required booting with the Vista DVD again and letting it do a repair.

DIY Carpet Binding

We’re pleased with the results of using Instabind to protect the edge of a carpet remnant that we bought for our basement.  In addition to the Instabind, I got a Surebonder PRO4000A glue gun, since it could take the long nozzle that Bond Products sells for use with Instabind.

The video below helped in figuring out how to deal with joining the two ends.

[youtube]http://www.youtube.com/watch?v=yqQPMvDtc_s[/youtube]