 I’ve been wanting to change some things about how our DotNetNuke Intranet site’s login page works, so here’s my record of what I did. I’m mainly writing this so that I’ll be able to reproduce it when I need to.
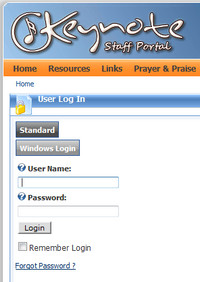
The default login page is shown at left. I don’t like how the buttons are stacked, I’d like to add some hints for users about how to use the Windows Login, and I’d ideally like people to be able to hit <enter> when they’re using Windows Login. I doubt I’ll figure that last one out before publishing this post. Right now, you can hit <enter> when using the Standard login, but hitting <enter> with Windows Login causes a “Login failed” message. I’m guessing that the <enter> is triggering a hidden Standard login button instead of the visible Windows login button.
Step 1: Create a new login page so that other content can be added more easily
Following the tips at dnngallery.net, I created a new page, added the Account Login module, and changed the Site Settings so that this page is the Login Page for the site.
Step 2: Reformat the login module
Since we’re allowing Standard and Windows logins, we need to edit two different Login.ascx files: one in DesktopModules\AuthenticationServices\DNN, and one in AuthenticationServices\ActiveDirectory. I changed the table width to 240, aligned the Windows login parts to the left to match the Standard login, and added helptext = “” to the labels to get rid of the little help icons (I found that tip here).
I also wanted it to be more obvious when someone clicked on Windows Login, so I edited AuthenticationServices\ActiveDirectory\App_LocalResources\Login.ascx.resx to change the label on the User Name box to “Keynote User Name” and the label on the button to “Windows Login”.
Step 3: Add other content to the page
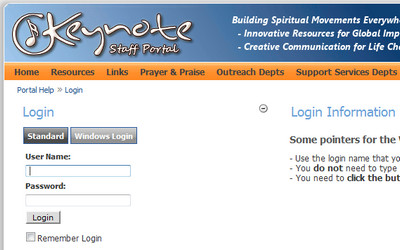
I added a text/html module to the page with some login tips.
Here’s the final result:

 Thanks to some people on the DNN Forums, I discovered that the Windows login error “Login Failed. Please remember that passwords are case sensitive” can also mean “you typed your Windows password correctly, but it’s shorter than the DNN default minimum password length of 7”.
 I’ve been wanting to change some things about how our DotNetNuke Intranet site’s login page works, so here’s my record of what I did. I’m mainly writing this so that I’ll be able to reproduce it when I need to.